TABLE OF CONTENTS
STEP 1
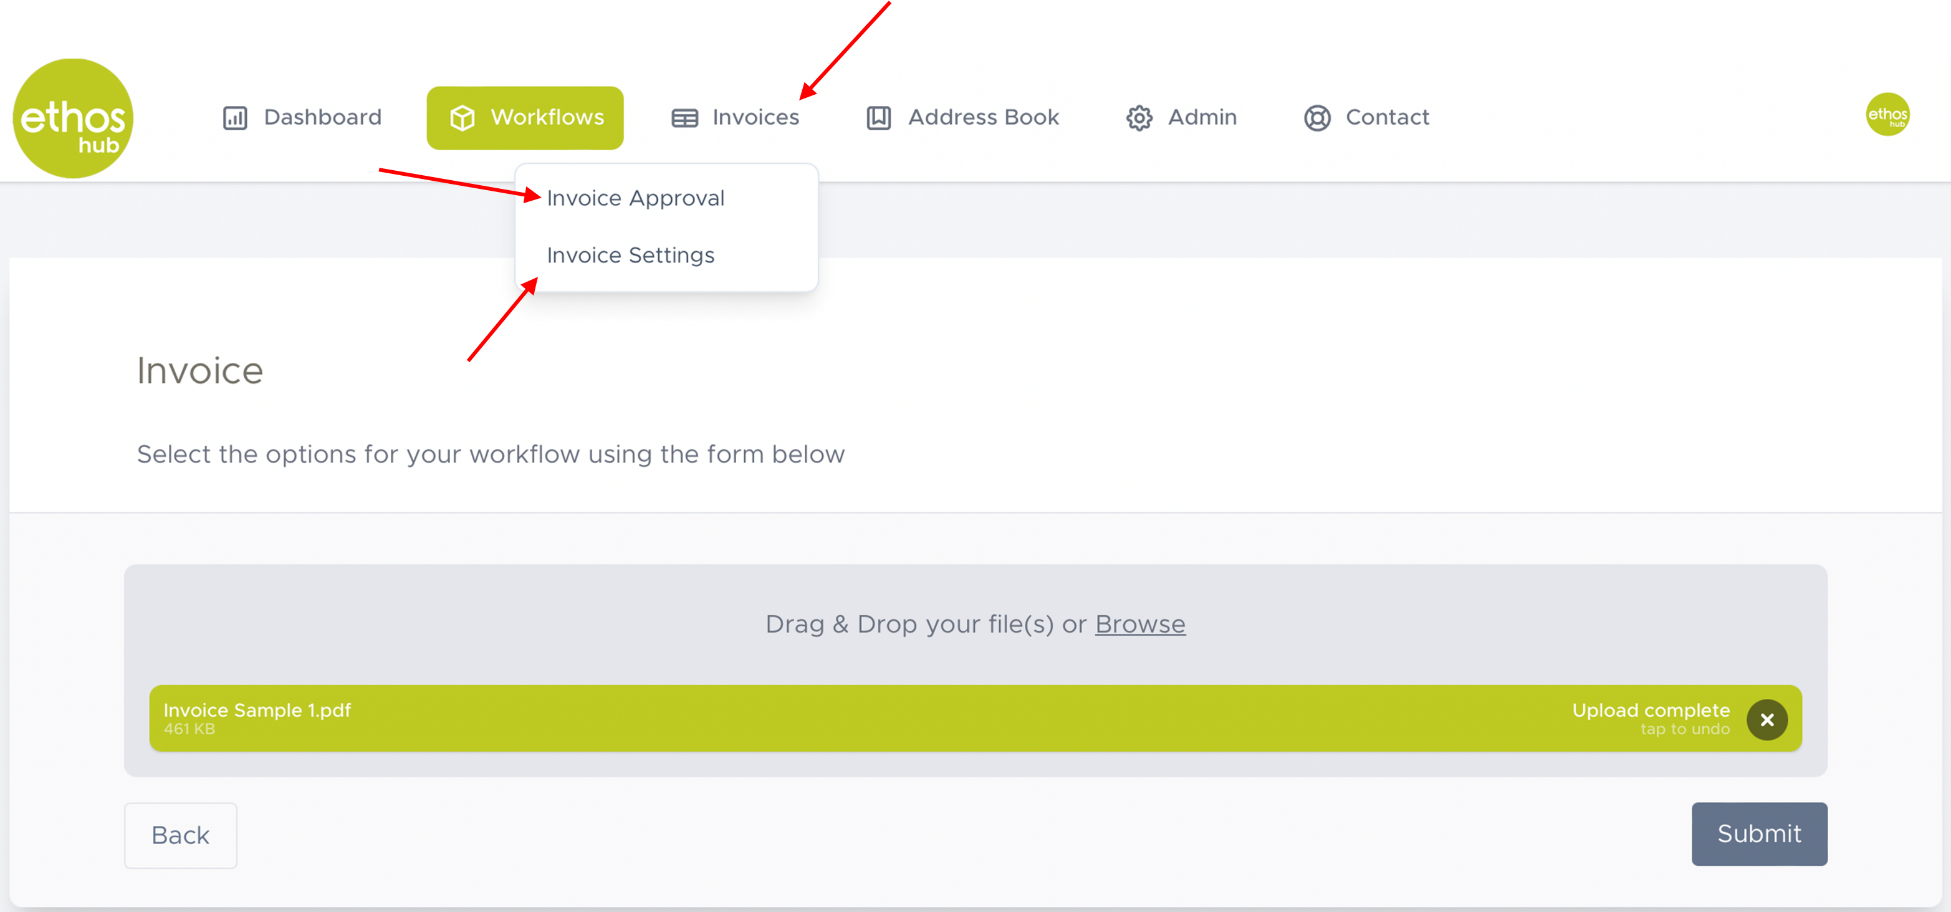
In the top taskbar click on the Invoices tab. You will be presented with a drop-down menu which contains two options. Invoice Approval and Invoice Settings.
STEP 2
Select Invoice settings. You will now be presented with the following page. In this section you can modify your Invoice approval Settings and or your Invoice Automation Settings.
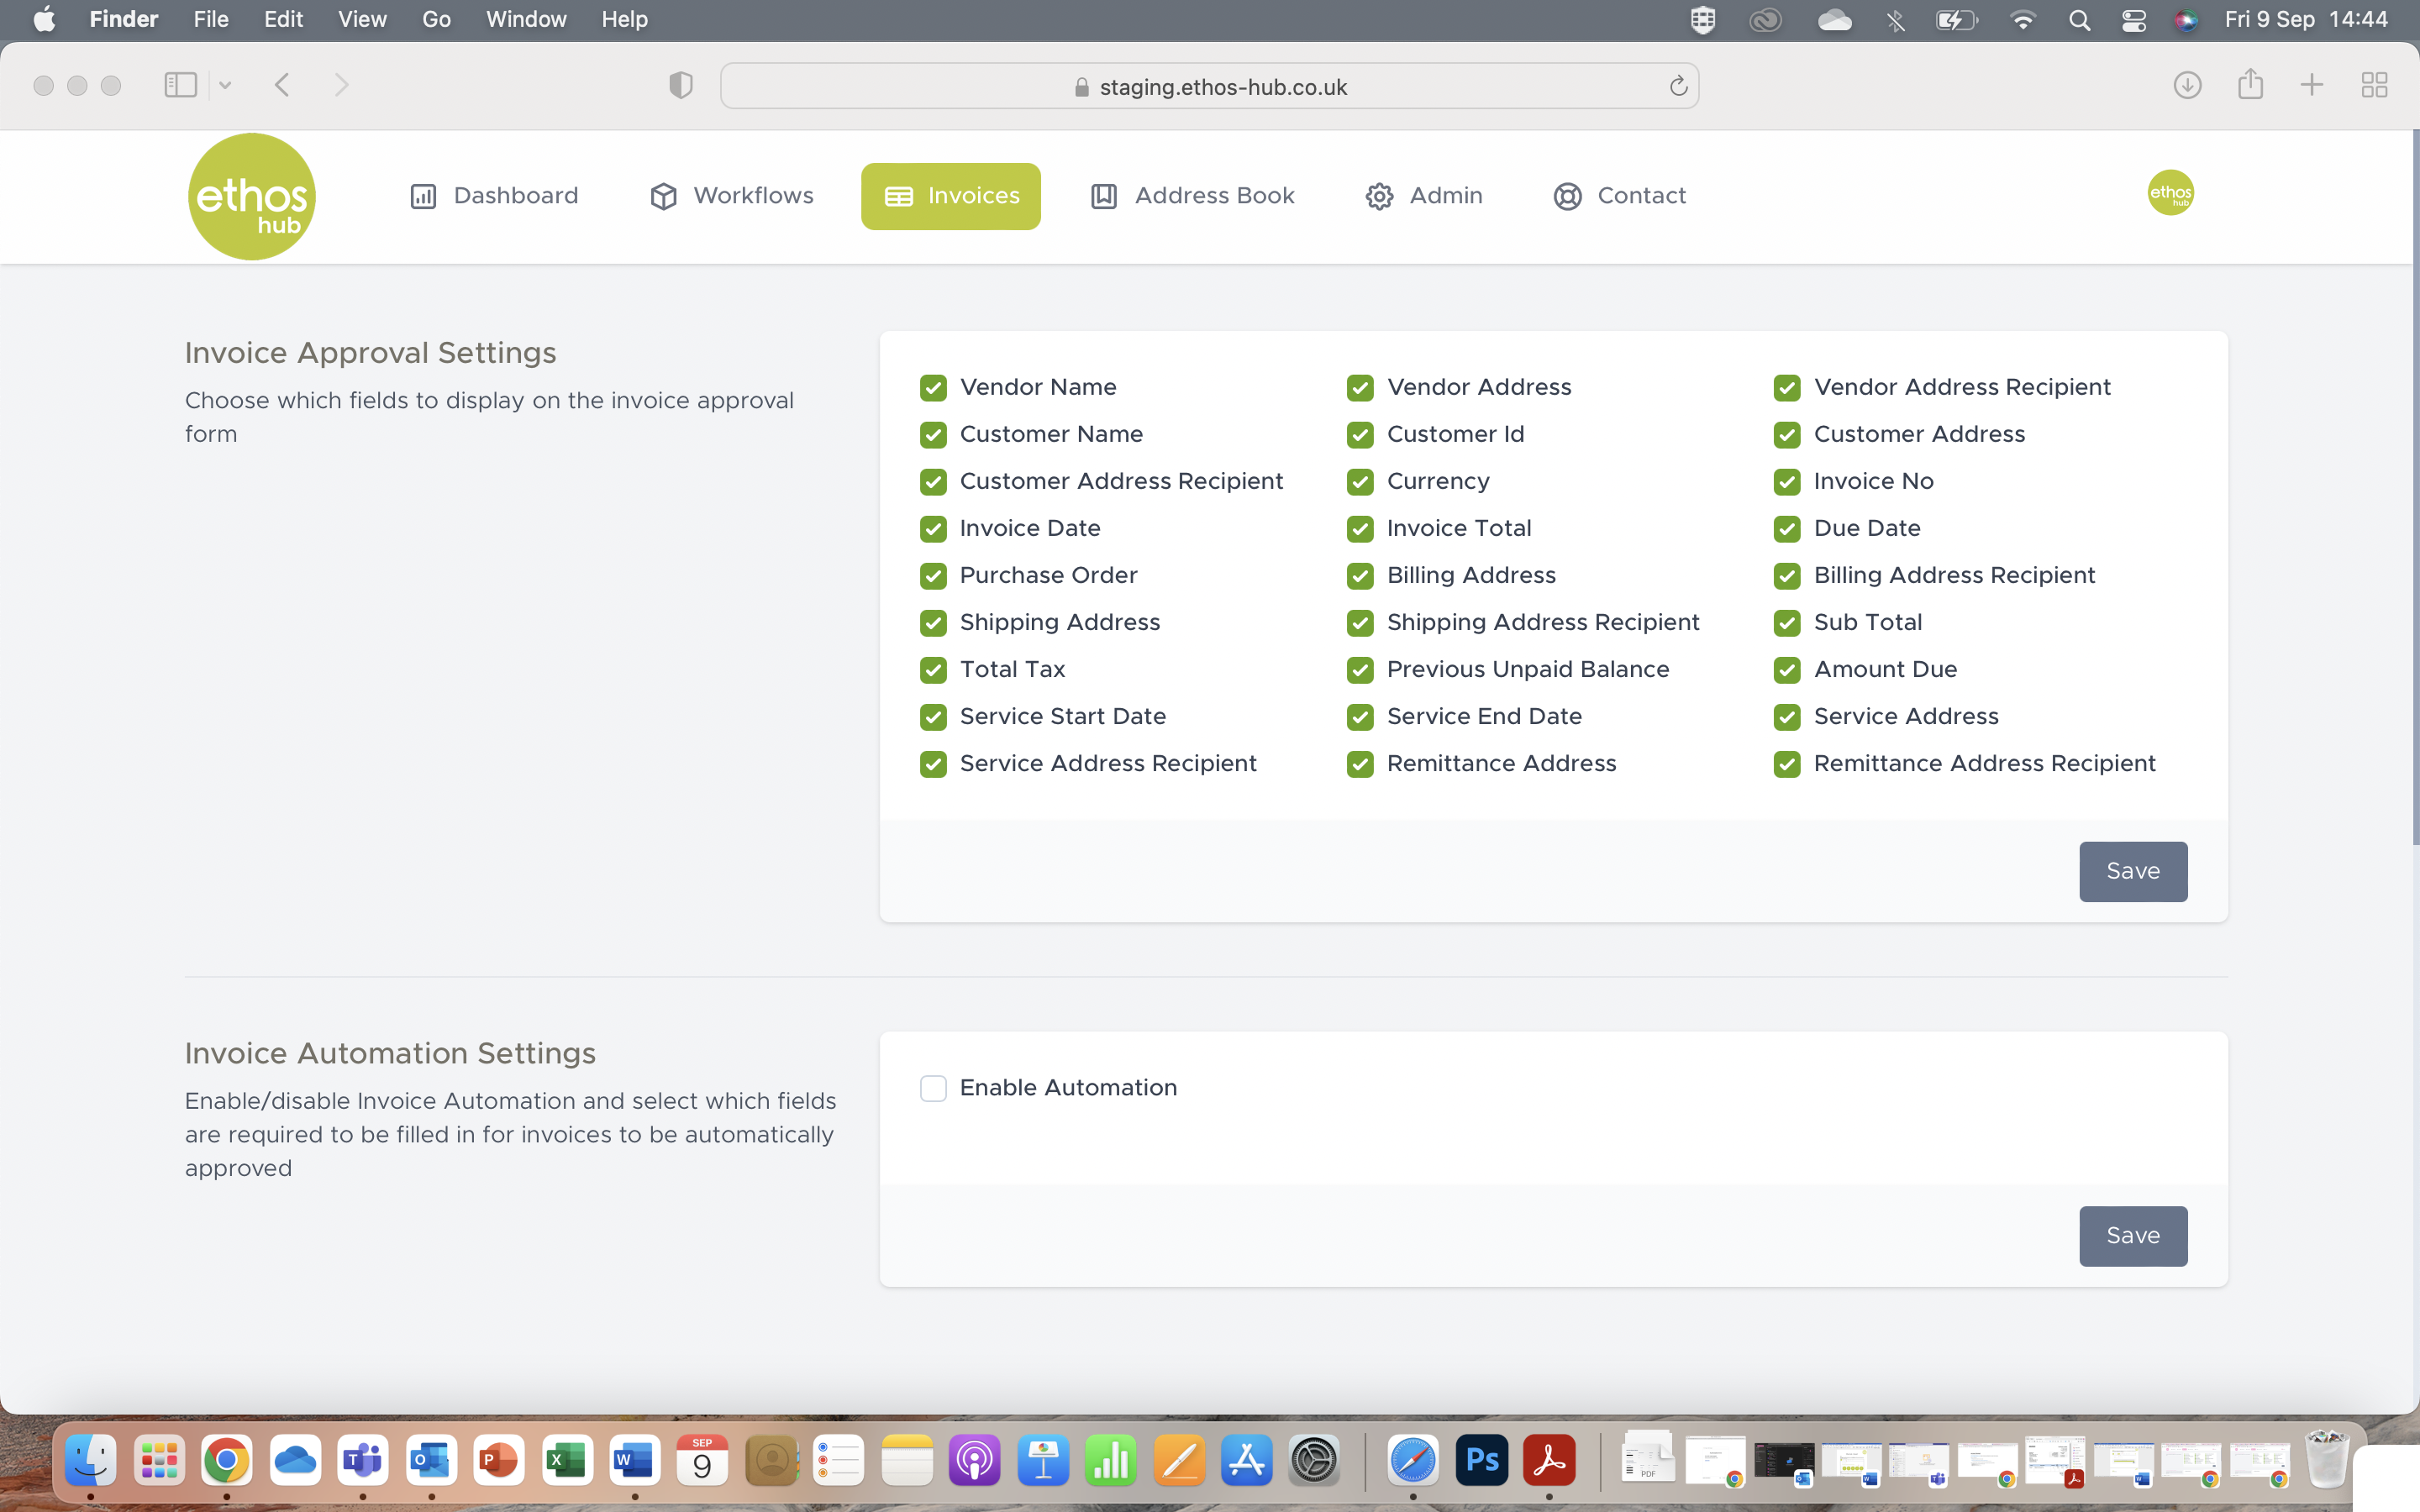
Invoice Approval
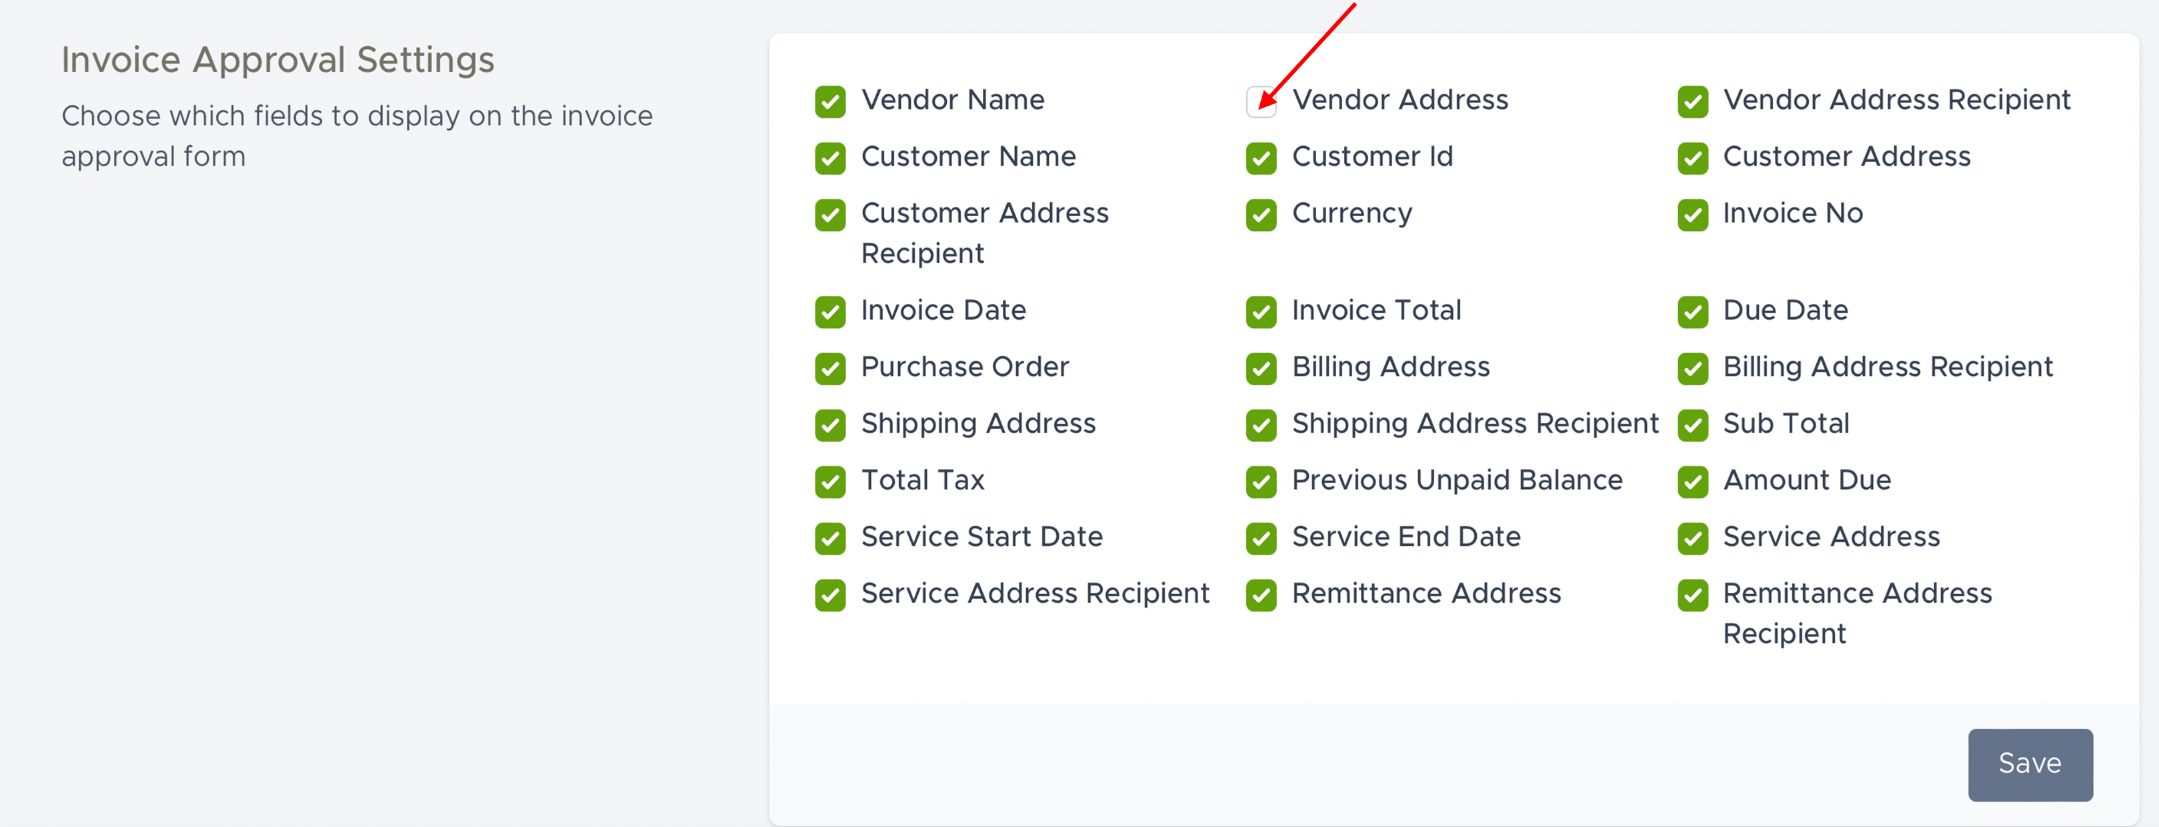
The invoice approval settings enable you to select the fields that you want to display on the invoice approval form. You can check or un-check the fields which apply to you. For example, you may want to hide the vendor address. Simply click on the field to uncheck the box and then click on the save button.
Invoice Automation
The invoice automation settings allow you to enable or disable which fields are required to be filled-in for your invoices to be automatically approved. Simply click on the enable automation field and you will be given the option to Set the minimum required for automatic approval and Select the fields required for automatic approval.
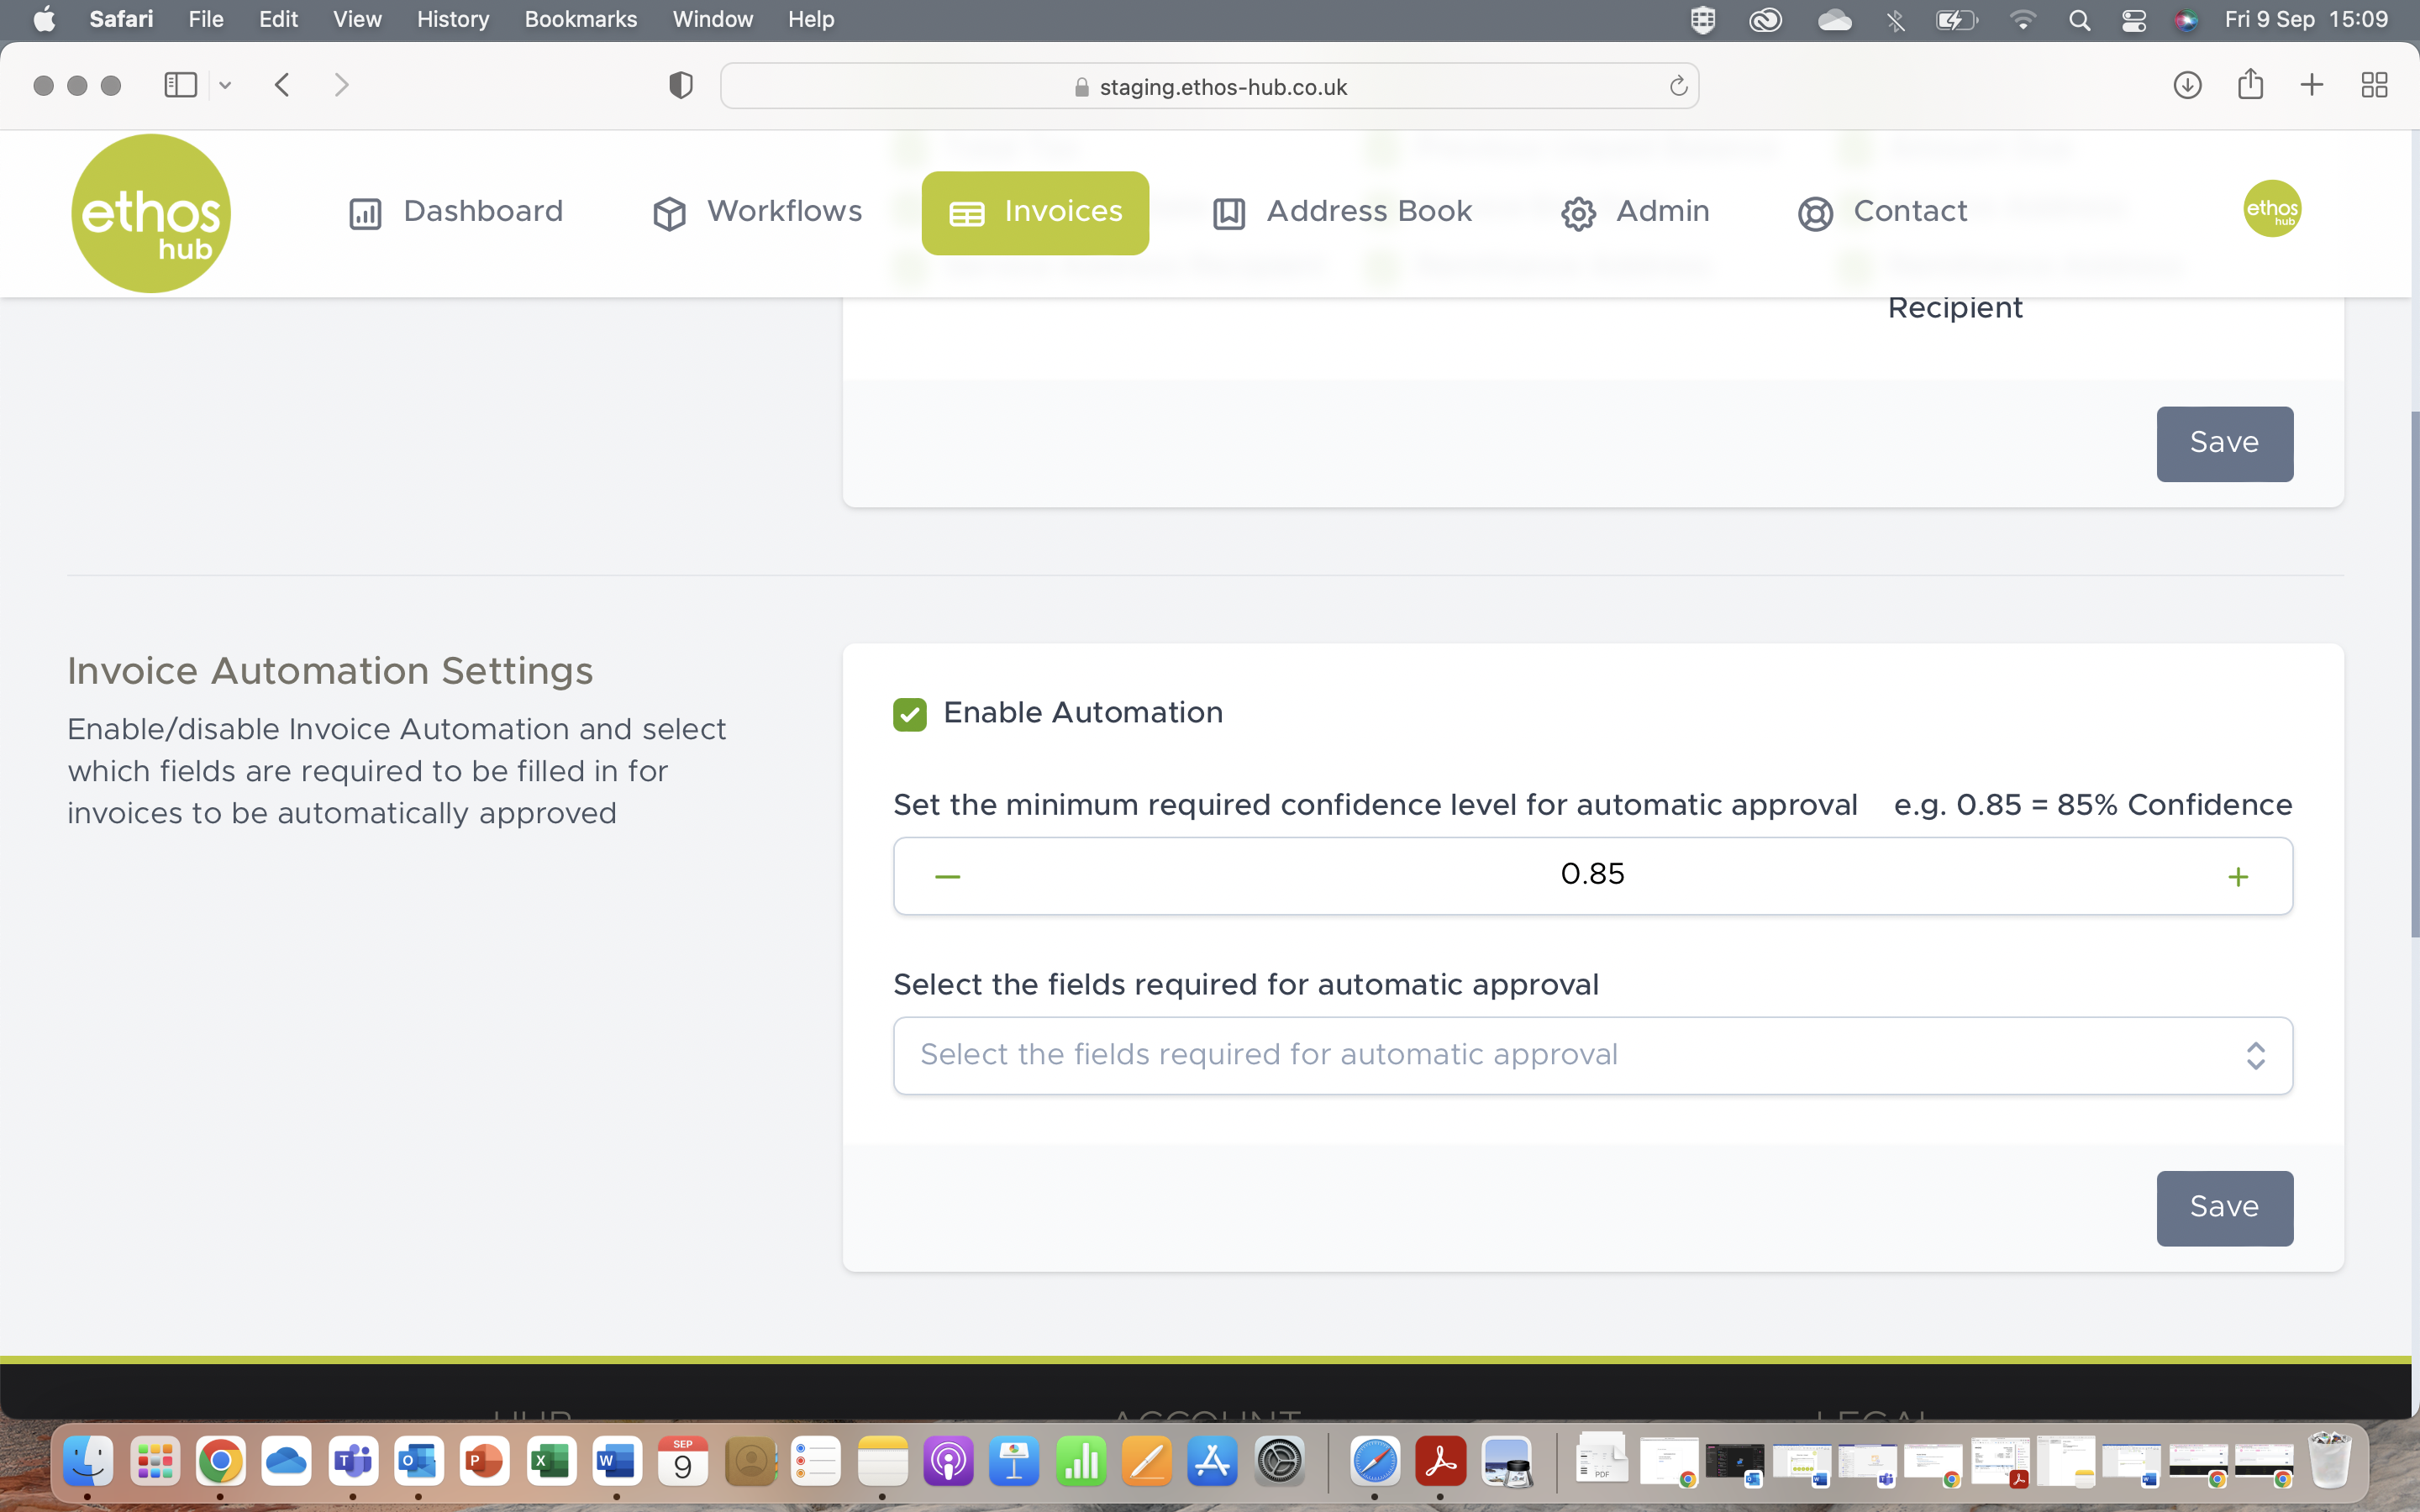
Confidence Level
Click on either the – or + signs to decrease or increase the confidence level.

Fields required for automatic approval
Click on the dropdown menu to select the fields that you require for automatic approval, you can also manually search for the fields.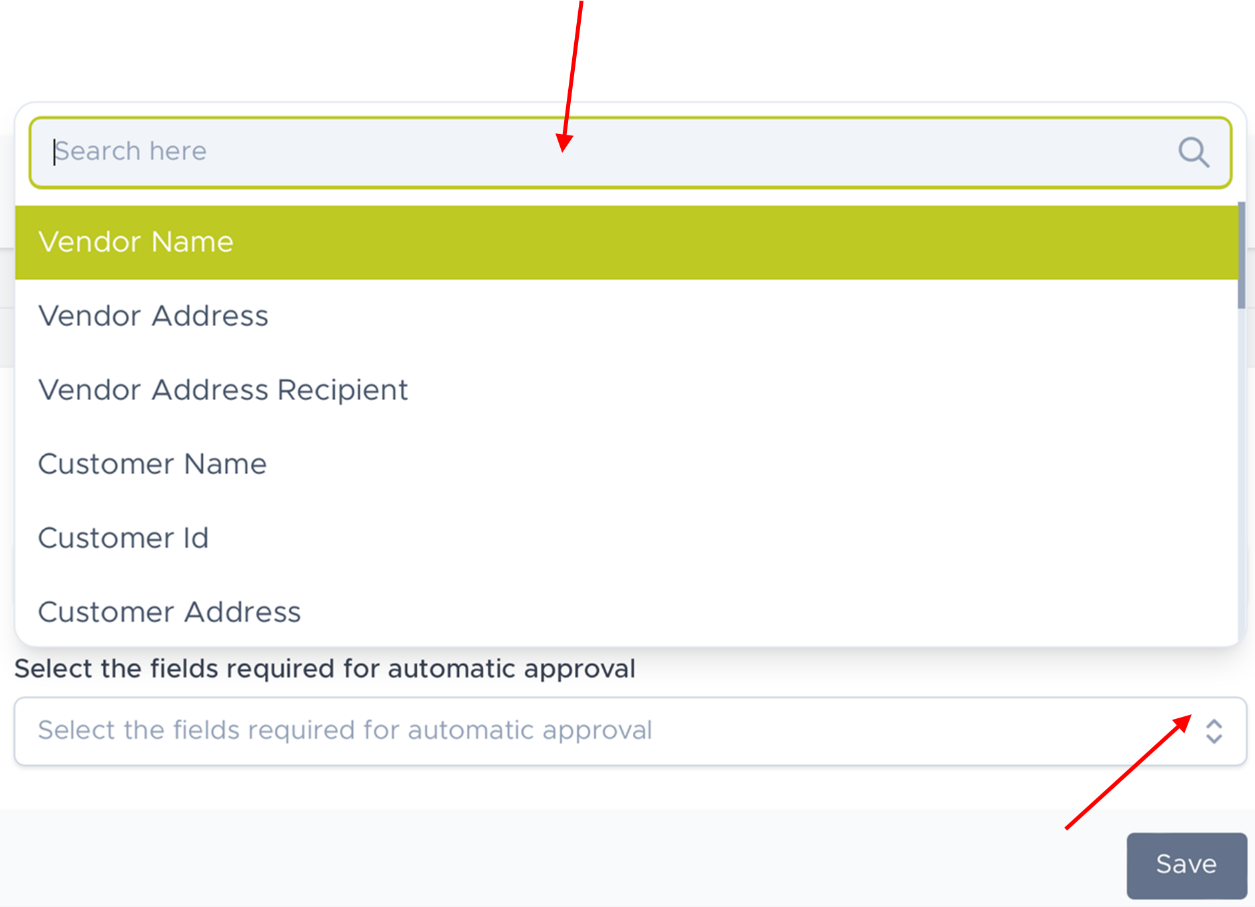
STEP 3
Once you are happy with your invoice settings, click Save
Was this article helpful?
That’s Great!
Thank you for your feedback
Sorry! We couldn't be helpful
Thank you for your feedback
Feedback sent
We appreciate your effort and will try to fix the article