TABLE OF CONTENTS
- STEP 1 - Login Page
- STEP 2 - Workflows
- STEP 3 - Select Workflow
- STEP 4 - Workflow Options
- STEP 5 - Recipient(s)
- STEP 6 - Upload
- STEP 7 - Submit
- STEP 8 - Complete
STEP 1 - Login Page
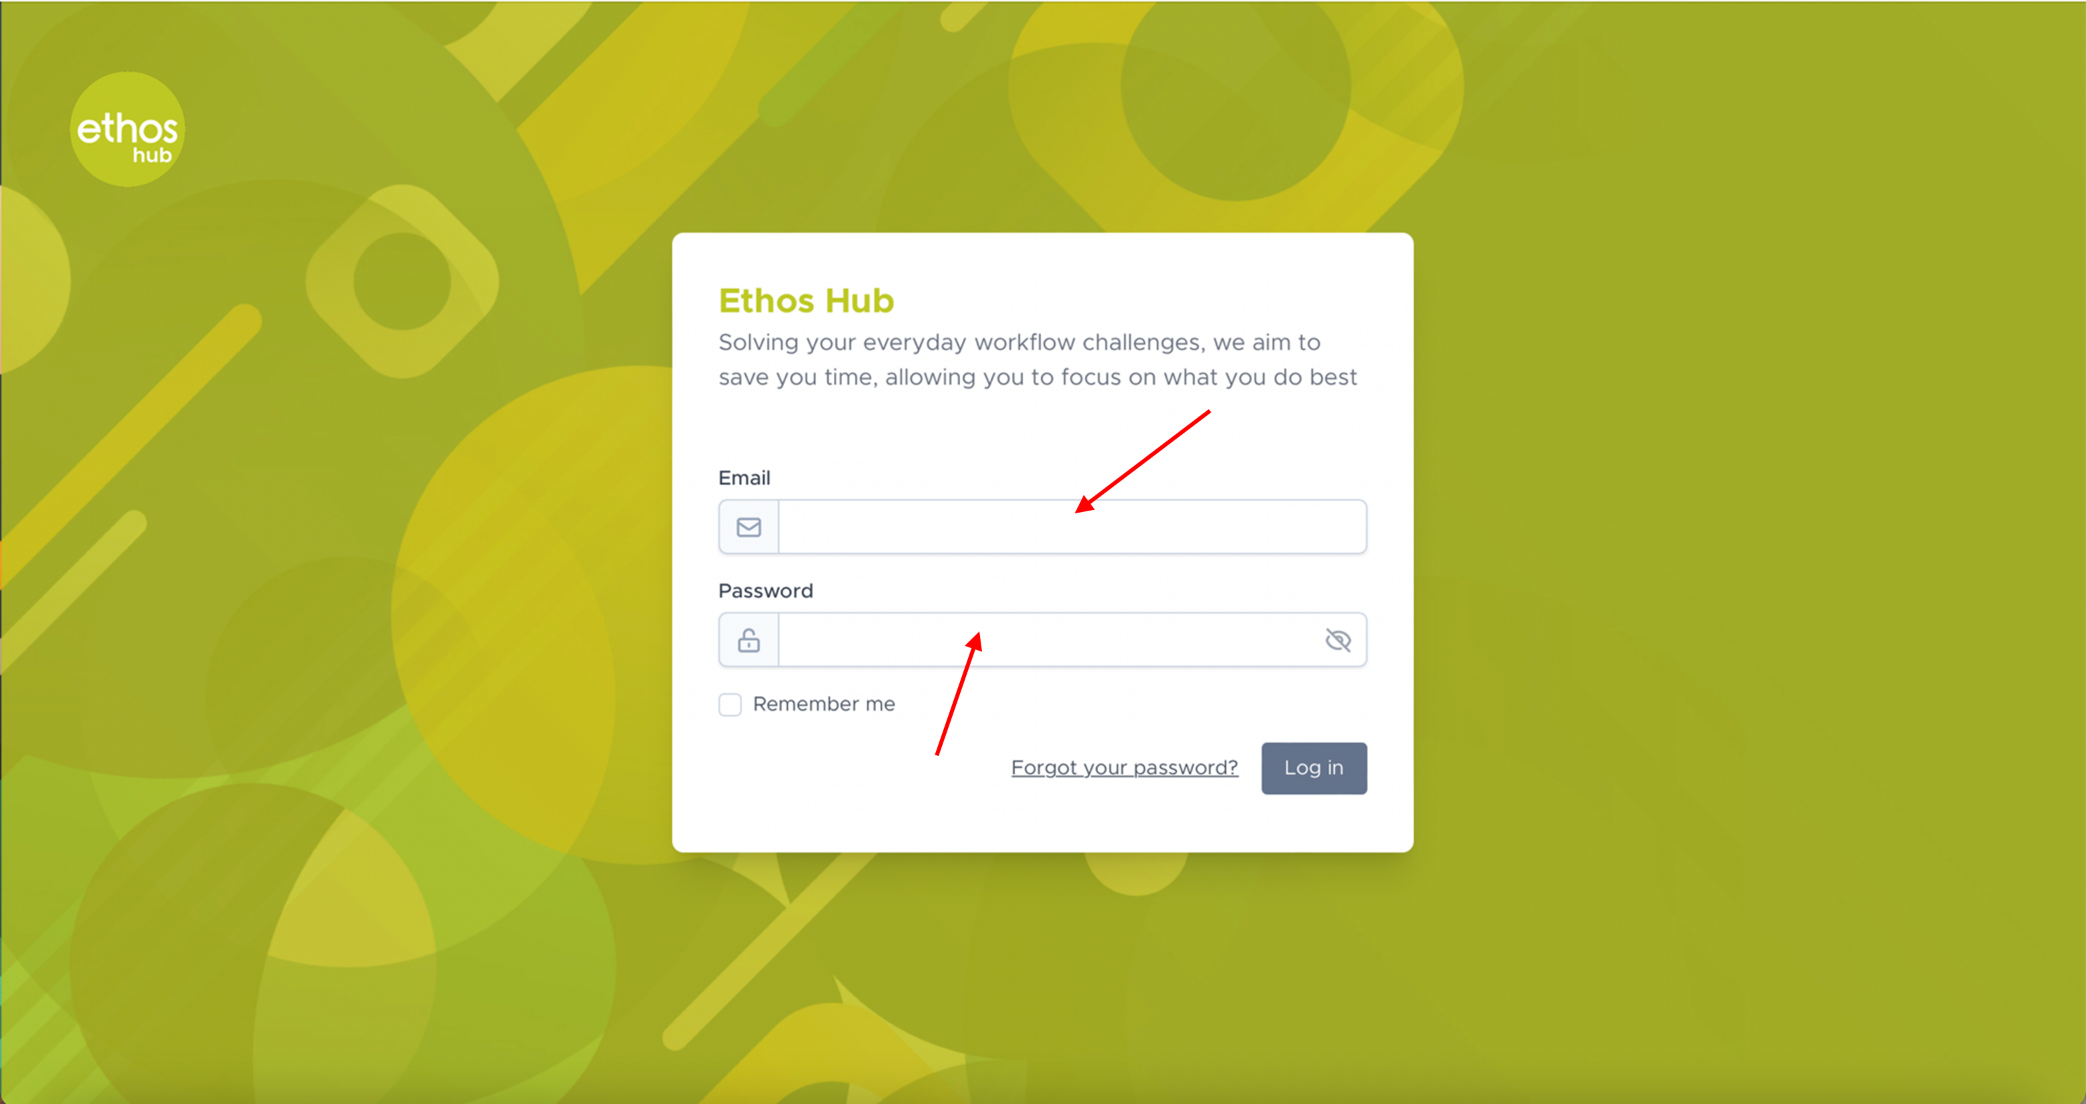 Enter your login email and password.
STEP 2 - Workflows
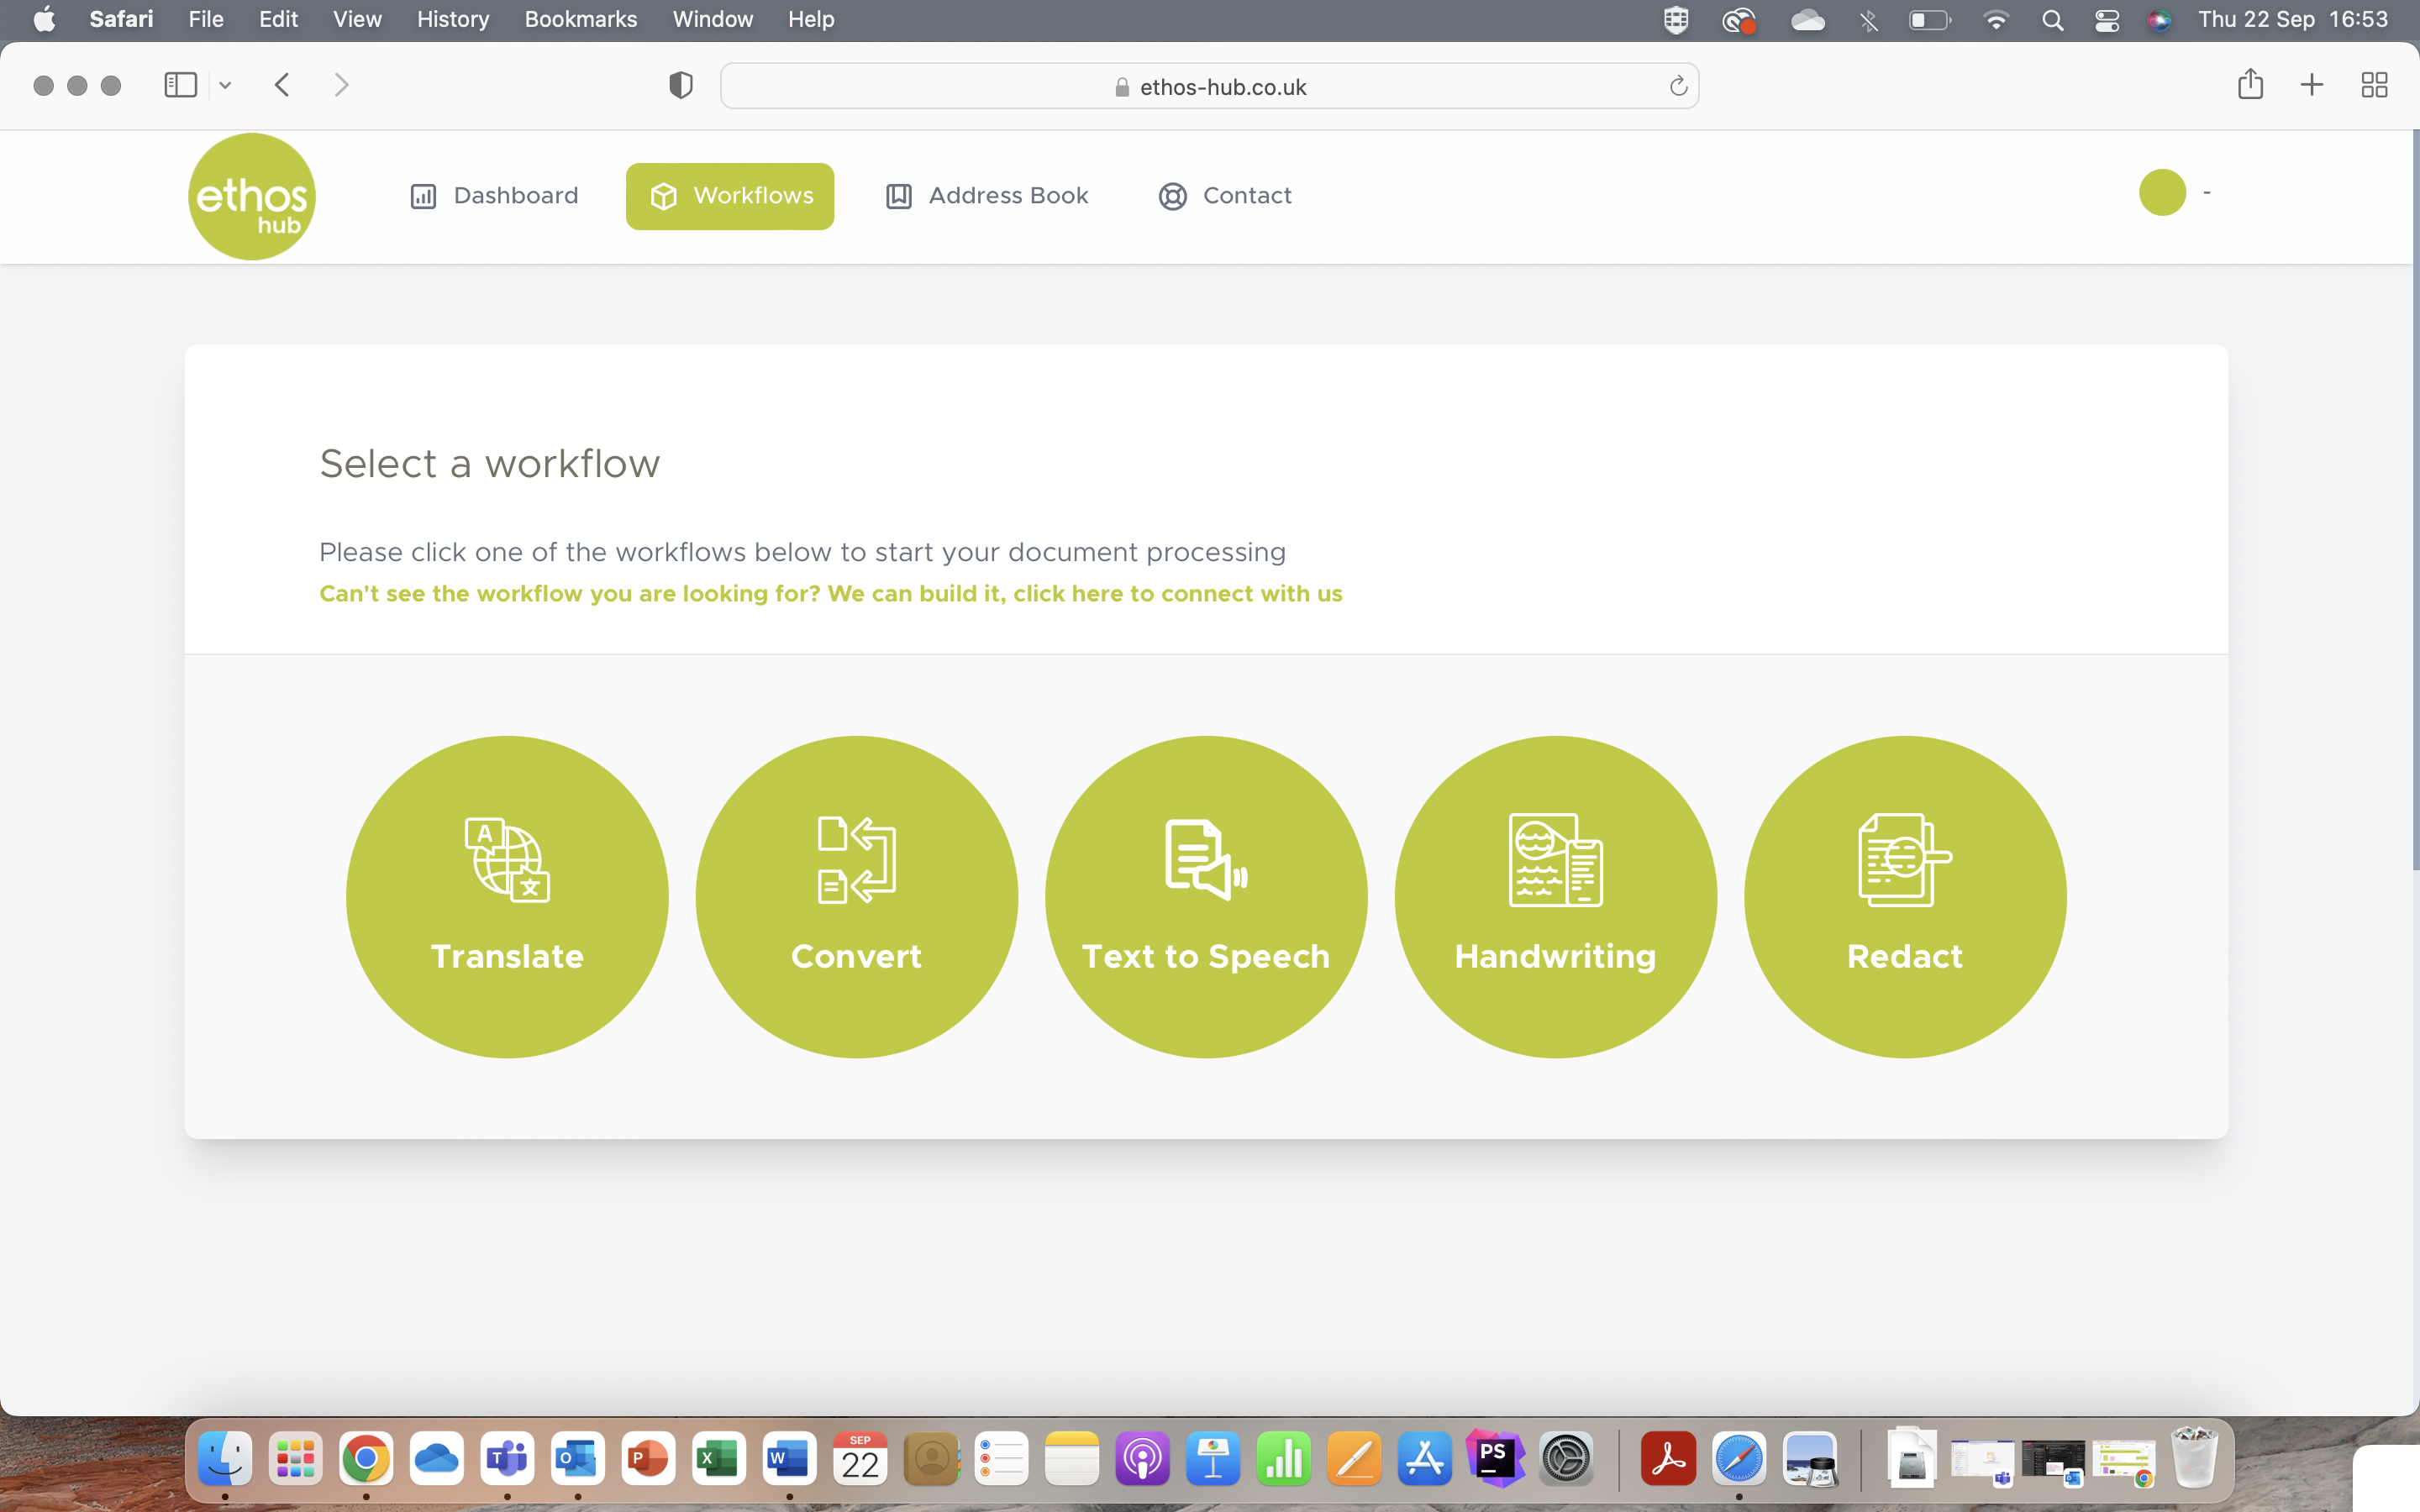 Once you are logged in, you will be presented with the following page.
Note: If you are not presented with the page shown in the step above, please select the Workflows tab displayed in the top taskbar as shown below.

STEP 3 - Select Workflow
At this stage, you will be given the option to select from one of the many workflows that we have available. Please click on the Handwriting workflow.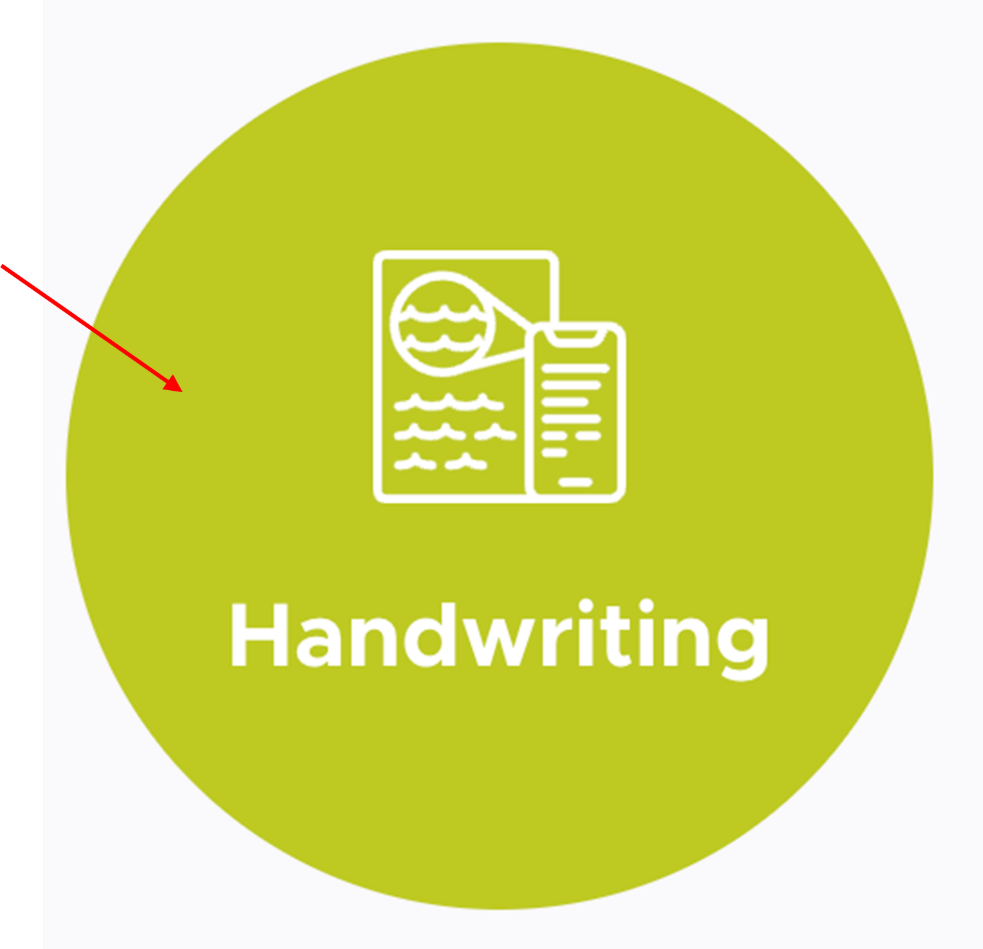
STEP 4 - Workflow Options
You will now be presented with this screen.
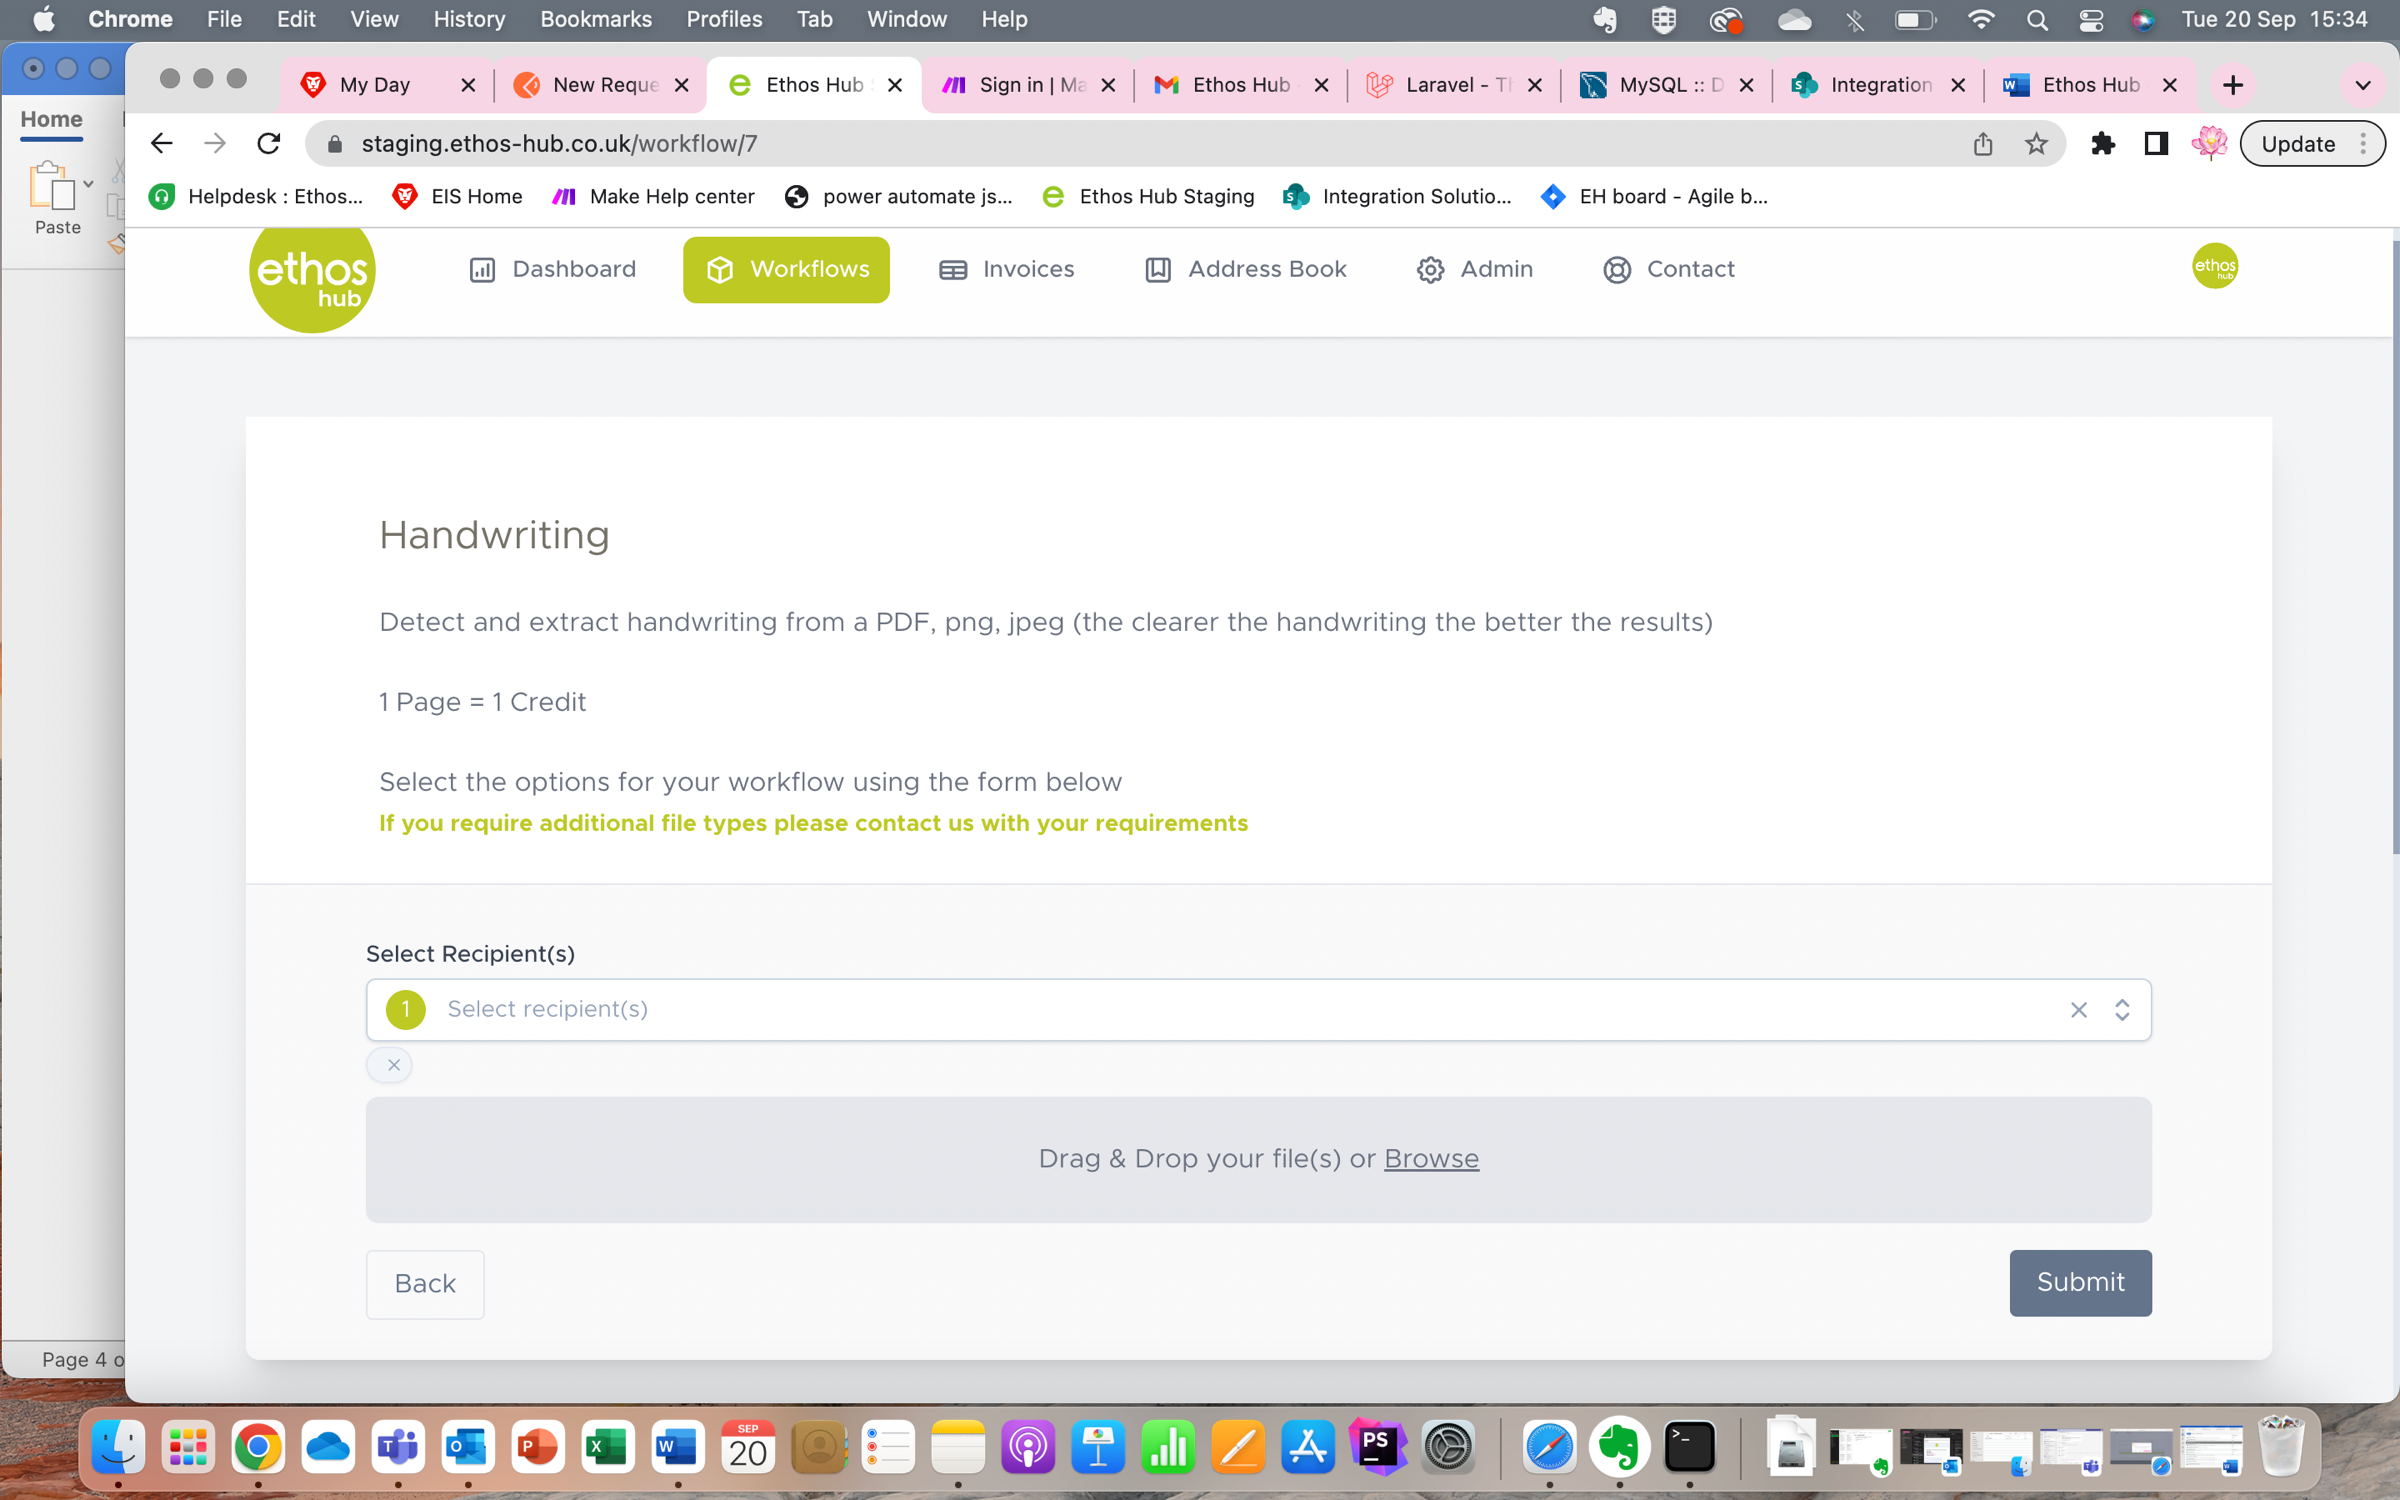
STEP 5 - Recipient(s)
Choose the Recipient(s) you wish to send the document to in the drop-down menu.
Note: The Recipient(s) field will automatically add your email and will also show other recipients that have been added to your address book.

STEP 6 - Upload
Upload your required file for conversion by simply dragging and dropping the file in the area below the fields or click “browse” which will allow you find the required file on your system.

STEP 7 - Submit
Once all required options have been selected, click Submit. You will receive an email with the completed workflow.
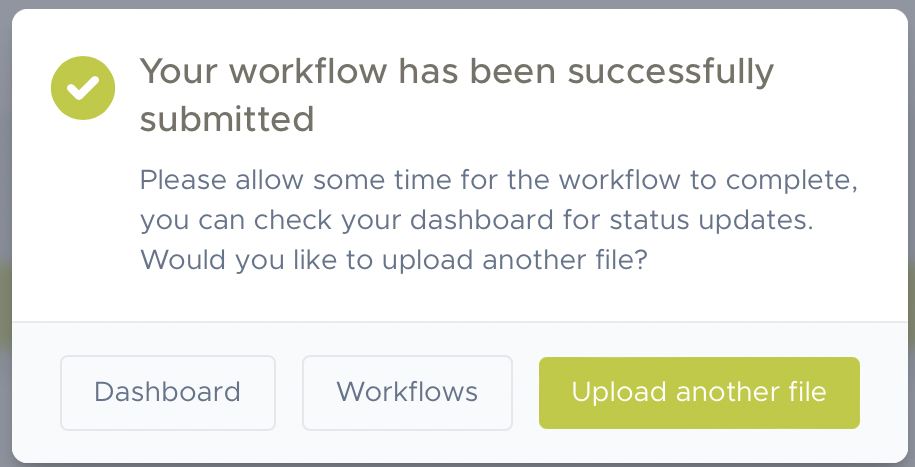
STEP 8 - Complete
After submitting the document, you will be prompted with the below screen. You can navigate back to your dashboard, choose another workflow, or upload another file.
Was this article helpful?
That’s Great!
Thank you for your feedback
Sorry! We couldn't be helpful
Thank you for your feedback
Feedback sent
We appreciate your effort and will try to fix the article